Zero-Point Security’s Certified Red Team Operator (CRTO) Review
Overview
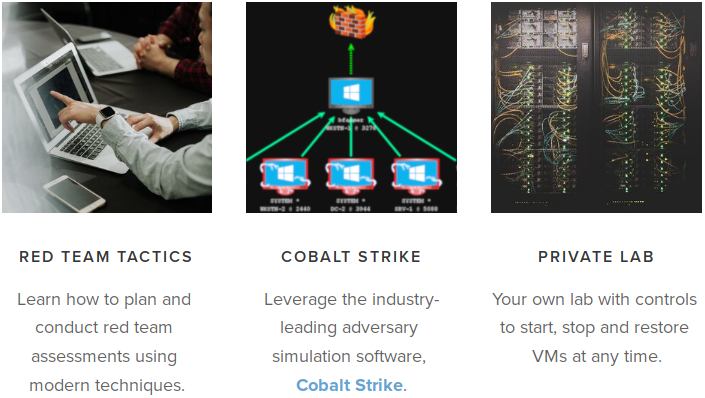
Red Team Ops is the course accompanying the Certified Red Team Operator (CRTO) certification offered by Zero-Point Security. The course was written by Rasta Mouse, who you may recognize as the original creator of the RastaLabs pro lab in HackTheBox. He maintains both the course content and runs Zero-Point Security.
Red Team Ops is written for individuals with a general background in information security, especially those working in offensive security positions. The difficulty is most applicable to a junior audience, but I would argue the course environment is also useful for individuals who are more experienced red teamers.
In this review I’ll give a brief overview of the course configuration, and talk about the pros and cons of the entire process in depth. I’ll also share my exam experience, and give some tips/tricks for passing. Lastly, I’ll close with some thoughts of why you might purchase the course (you totally should by the way).
My Background
CRTO was the logical next step in my personal journey after achieving OSCP in the prior year. After taking some time to get sped up on web application testing, I developed a huge interest in Active Directory/Windows-centric tactics. This was especially true after PetitPotam came out and the awesome work by Will Schroeder and Lee Christensen was made public.
A Bit of History
Prior to purchasing the course myself, Rasta announced a significant change to how it would operate. Most notable of which being the fact that Cobalt Strike is included with the course purchase. Covenant is also no longer supported within the labs and course content, and private lab environments are provided to all students.
There are a handful of reviews on both this updated version and the prior version with Covenant/BYOC2, shared labs, etc. To be clear, this review pertains to the most recent CRTO (CRTO2?) update.
The Course
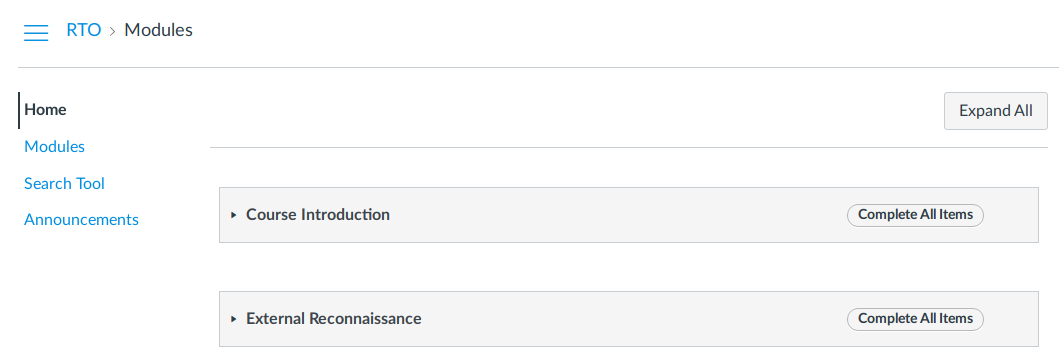
Content within Red Team Ops course is split into the following sections:
1. Course Introduction
	1. What is Red Teaming?
	2. Phases of an Engagement
	3. Command & Control
	4. Cobalt Strike Primer
2. Planning & Client Engagement Phase
3. Assessment Phase
	1. External Reconnaissance
	2. Initial Compromise
	3. Host Reconnaissance
	4. Host Persistence
	5. Host Privilege Escalation
	6. Domain Reconnaissance
	7. Lateral Movement
	8. Credentials & User Impersonation
	9. Password Cracking Hints & Tips
	10. Session Passing
	11. Pivoting
	12. Reverse Port Forwards
	13. Data Protection API
	14. Kerberos
	15. Group Policy
	16. Discretionary Access Control Lists
	17. MS SQL Servers
	18. Domain Dominance
	19. Forest & Domain Trusts
	20. Local Administrator Password Solution
	21. Bypassing Antivirus
	22. Bypassing AppLocker
	23. Data Hunting & Exfiltration
4. Post-Engagement & Reporting
5. Extending Cobalt Strike
It would be too lengthy to talk about each section in detail, so I’ll highlight a few takeaways:
- Operational Guidance: One aspect of the course I found surprising is the amount of content around engagement planning and operation. While it’s not to the level of detail present in something like Red Team Development and Operations by Joe Vest, it does contain helpful information around planning, reporting, and the non-technical aspects of security consulting. This is valuable information, especially if you’re like me trying to figure out how to master both of these aspects.
- Targeting Microsoft: This sort of goes without saying, but you’ll notice that almost every section is focused around technologies such as Windows, Active Directory, Kerberos, and so on. This means that once you come out of this course you’ll have a massive bag of tricks to attempt during your next engagement. Bad news? We’ll if you’re tasked with an engagement on a shop that purely uses Macs and Chromebooks you might be out of luck. I don’t necessarily see this as a con as this course is intended to fill the widest use-case you’ll encounter as a junior pentester/red teamer, which is a Microsoft technology stack.
- OPSEC: When applicable, course sections contain guidance around Operational Security (OPSEC) or in other words how to not get caught. These tidbits of information were amazing for me to begin thinking about purposefully remaining quiet, a tactic I have not had to employ in the past. On top of that, the lab environment contains a Splunk ingestion server you can use to actually analyze events as they occur within the environment.
A great piece of supplemental learning to go along with OPSEC content from the course is this talk by RastaMouse himself:
Five Ways I got Caught Before Lunch
Here are five sections I found especially fun/interesting:
- Initial Compromise: Interesting tactics used to get a beacon to spawn on target machines, including topics such as malicious Office documents and HTA files.
- Host Persistence: Lots of cool ways to stay sticky on hosts, along with some cool exercises related to COM objects. This section is also probably really useful if you work in a SOC/DFIR type role.
- Kerberos: By far the most ingestible Kerberos overview I’ve ever encountered, packed with great techniques on how to attack it, especially tailored for AD environments (of course).
- Forest & Domain Trusts: This begins with an amazing overview of Active Directory trust types, then delves into ways you can attack each. Second only in my mind to Harmj0y’s extremely detailed Guide to Attacking Domain Trusts.
- Local Administrator Password Solution: Fun ways to (ab)use LAPS-specific permissions within an environment.
Note: it was really hard to choose my top five.
Pros of CRTO
Price
It would be hard to begin talking about the CRTO’s pros without first mentioning the price.
At an astounding cost of $472.0806 US dollars you get access to the entire course, as well as any additional content that is added to the curriculum in the future.
That’s a fraction compared to other industry leaders like:
- Offensive Security: generally starting at a minimum of
~$1,000(if not more) - INE/eLearnSecurity: at a
$749annual fee with individual exam fees. - SANS training: with the GIAC course sitting at around
~$8,000including an exam attempt.
This is not to say that those training platforms don’t have value. I personally know that the opposite is especially true. I bring this up rather to illustrate how insanely cost-effective the CRTO is compared to the rest of the industry.
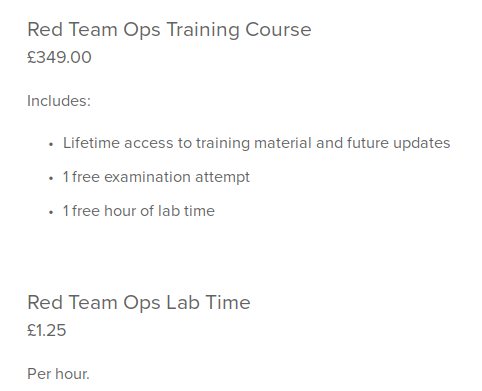
Lab Time
In order to access the labs, you must purchase lab time separately. This is purchased per hour, at a rate of £1.25/hr or $1.7/hr.
I would at a minimum purchase 40 hours of lab time, but highly recommend future-proofing yourself with extra time. Let’s say you give yourself 80 hours, that brings your total cost including the course purchase to: $607.
I personally went with 80 hours when I signed up. Let’s talk about why this matters.
Labs
The lab environment for CRTO is deployed through a platform called SnapLabs.
Why does this matter to you? well SnapLabs is where you’ll manage all your lab machines. This includes snapshotting, stopping/starting machines (duh), and resetting your lab environment.
It’s also how you access your machines when you want to follow along with the course, perform exercises from the content, or just mess around. This is done through the web browser, with desktop sessions deployed through Apache Guacamole.
Also, as I mentioned earlier each student gets their own unique lab environment. You no longer have to worry about H3x_budd1e changing all the passwords or nuking that box you were working on. Your environment is completely yours.
Environment
Once you purchase your lab time and receive access, you’ll be dropped into an environment with:
- An attacking Windows/Linux host (Kali)
- MSSQL servers
- Exchange servers
- Unix hosts
- Windows workstations
- Windows domain controllers
- Splunk… wait… Splunk? yes. Splunk.
Did you hear me mention Splunk? No way. Let’s talk about Splunk.
Splunk
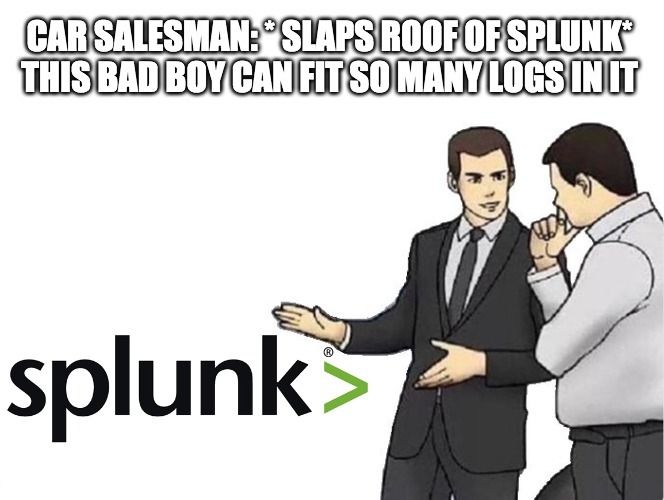
This is a hidden gem that’s included in the course and something that I personally think is extremely beneficial for the student.
The course not only provisions all these boxes for you to use, but also has them pushing logs to Splunk.
Wow! Amazing! Well guess what.. you can access the Splunk instance too.
This was really useful for myself to:
- Realize just how many !@#!$%! events are generated in live networks
- Figure out how to filter down specific events I’m looking for
- Analyze detection methods for the tactics I employ
You might remember I mentioned purchasing extra lab time. This is one of the reasons why. I plan on going back and using the lab from time to time to analyze the detection of tactics I’m executing in the real world. This is one of the reasons I think the course is also beneficial to red teamers with pre-existing experience.
Playground
Using SnapLabs is really easy, and having the ability to spin up an entire lab on a whim has proved to be useful for more than just the course. There have been a couple instances where I’ve been chatting with someone on Discord about a technique or a tool, and quickly spun up the CRTO lab to test something.
This is another reason to purchase more lab time if you’re able to. It’s a nice playground to have in your back pocket.
Rasta’s Teaching Style
This is easily the highlight of the entire course.
Each piece of course content is divided into bite-size chunks that can be easily ingested. An individual article usually begins with a rough overview of the minimum information needed to grasp a topic and understand why it matters. Next it will delve into usage examples that are short and sweet. These serve the purpose of getting your hands on the keyboard executing commands, which for myself is the most productive method for me to ingest information.
Additionally, there are a handful of included videos walking you through a technique or demonstrating a tactic. These are usually ~10 minutes long, and fairly straight to the point.
Personally, I found the articles on each topic to be where the course really shined.
Want to learn about Kerberoasting? Read the 5 minute article, then go perform the tactics in your live lab environment.
No sifting through a PDF and making notes. No slide deck extravaganza. Just read a quick article and start playing around.
Comparisons/PTSD
If you’ve experienced the OSCP, chances are you remember how hard it was to focus on the PDF or watch the provided videos.
In my experience, I would try to force myself to ingest content, and do so at a rapid pace to keep up with my personal timelines (and expiring PWK lab time).
Alternatively, with CRTO I found myself actually looking forward to ingesting the course content, something that I’ve rarely been able to say in other learning efforts.
Cobalt Strike

Lastly, it must be mentioned that Cobalt Strike (CS) is included within the lab environment. If you’re like me, you’ve been dying to get your hands on this toolset for years. I found finally getting to use it to be extremely fun.
Additionally, Rasta includes content on configuring CS to your needs (more on this later), which should help you kick start using it in the real world, should you have the ability to.
As far as I’m aware, CRTO is the only (legal) way of getting a taste of using CS apart from purchasing a license. So if you’ve been looking to get their hands dirty with it, the course is a great place to start.
Cons of CRTO
Connection Options
I mentioned this earlier but wanted to reiterate the topic. A common complaint with the course is that you are locked to the browser when accessing your lab machines. No VPN connection, no .ovpn file, just Apache Guacamole and lots of browser tabs.
For myself this was really annoying in the beginning, but I quickly got used to it. It actually comes in handy if you’re switching between more than two assets inside the lab.
With that said, it may be a major turn off for some people, which is warranted, but not enough in my mind to completely discount the course. I figured it’s worth mentioning in case you’re expecting VPN access.
Cobalt Strike
Yes, this is a pro and also a con.
The course is tied heavily to usage of Cobalt Strike. The examples included within each section are strictly built for Cobalt Strike. This may or may not be a big deal for you depending on your situation. (i.e. whether or not you can afford it IRL).
One thing I will say is that the techniques and tactics employed by CS can generally be adapted to any platform, so it’s more than likely still a value-add. Oftentimes, you’re really just using Cobalt Strike’s execute-assembly to run a binary on a host, which is not nearly unique to the platform.
If this is something you’re worried about, I would recommend attempting to locate a similar or comparable functionality in $c2_tool_you_use to whatever Cobalt Strike functionality is being used in the course.
Exam
The CRTO exam is a 48-hour assessment where the student must gather 6 of 8 flags to pass. This 48-hours of lab time is spread across a 4-day window, as you have the ability to stop and start the exam environment as needed.
To pass one must simply submit the flags. No reporting is necessary.
Once your exam time begins, you will be provided with a packet containing a set of TTPs to emulate. One must successfully emulate these TTPs to progress through the environment, and collect all the flags.
Also, since you can pause the exam and still start the labs, if you really need to go back and double check something in a pseudo-dev environment, you can (although you’ll want avoid this as you progress).
Overall, I would say the course is pretty difficult, but extremely fair. You may be asked to perform steps outside of your comfort zone, but I truly mean it when I say the course content contains everything you need to pass.
Keys For Success
- FAQ: Read the course FAQ and exam FAQ. Seriously, read the FAQs. There were so many times in the Discord server I saw questions that are answered on those links.
- Discord: Speaking of Discord, you should totally join the Zero-Point Security Discord server. This was crucial for not only my learning experience, but also my passing of the exam (more on this in a sec). Within the server you’ll find students progressing through the course/labs and a fairly active community. I found everyone to be very helpful should you have any questions on the course content.
- Cobalt Strike Config: Make sure you review every piece of content in the course related to Cobalt Strike and its configuration. Additionally, it would be really helpful to take a look at some Malleable C2 Profiles and understand what they are doing. This is going to help you out immensely when you start your exam.
- Have fun!: The challenges within the exam are extremely enjoyable. So start the exam, get Cobalt Strike configured correctly, sit back, and start progressing through the environment. If you worked your way through all the course content and took good notes, you should have a good experience.
My Experience With the Exam
First off, let me say that even after my initial struggles, this was by far the most fun I’ve had on an exam so far.
I scheduled my exam scheduled Friday at 10:00 AM my local time. I woke up around 8:00 AM, had a small breakfast, made some coffee, and gathered my notes.
The clock hit 10 and my lab time started. I reviewed the TTPs passed to me as part of the exam and immediately felt that rush you feel when you begin an exam you know you didn’t study for. You know what I’m talking about. That sinking feeling in your stomach of inevitable failure.
I had focused so much on all the tactics presented in the course that I had forgotten to review the course material around configuring Cobalt Strike.
Scrambling
By around noon I was effectively freaking out, worried I would not even be able to reach what was effectively the first step of the exam.
I paused the exam environment for a large part of the entire first day and spent the remainder reading Cobalt Strike documentation, reviewing course content for configuration guidance, and generating my profile.
Time progressed, and eventually at around 2:00 AM the next day (Saturday), I decided to give it a go.
I powered on the exam machines. Tried what I had been preparing for the entire day and…all my attempts were unsuccessful. Distraught and pretty stressed out I paused everything and went to bed.
Round Two
I slept from around 4AM - 10AM, got up and immediately hit the ground running.
Refreshed, I realized I had rabbit-holed really really hard the entire prior day, and tried a new method to achieve “step 1”.
FINALLY, I received the “output” I was looking for. I had the breakthrough I needed.
This occurred around noon on the second day, and I had also only used around ~6 hours of exam time thanks to the tactical pause. Now it was time to truly begin.
Riding the wave of a Dunning-Kruger graph
At this point, I was fully riding the wave of a steep Dunning-Kruger graph.

I took some notes throughout the exam to document what I was feeling, the one around this time read:
I spent around ~20 hours getting it [Cobalt Strike] to work
I feel like I can finally actually take the exam
And take the exam I did. Within an hour I had compromised the first host, and after a few more hours worked my way to an additional handful of assets.
I progressed through the lab environment, never having to reset the exam or restart/reconfigure Cobalt Strike.
I really wish I could share the war stories of all the cool steps within the lab, but you’ll just have to see for yourself.
As time progressed, eventually the clock struck around 4AM the following day (Sunday). I had been going since around 10AM the previous day (Saturday).
At this point I had progressed through the environment pretty far, and after a large final hurdle finally gained access to a total of six machines in the environment.
No flags yet. Wait, no flags yet!?
Yeah so it turns out you really shouldn’t reset the exam environment unless you have to. During my initial Cobalt Strike fiasco I had reset the environment, which it turns out produces an error where no flags are present on the exam machines.
I was so focused on progressing across hosts that this didn’t really cross my mind until I reached the sixth machine. After which I kind of thought “Wait, should I be seeing some flags?” and got worried.
After reviewing the FAQ, it looked like each machine should possess an individual flag. My notebook at this time read:
Popped 6/8 machines which means I passed
kinda.... the only issue is none of my machines have flags on them lol. Trying to get ahold of Rasta to ask him
I DMed Rasta and thanks to his help and some screenshot providing, was awarded the flags I needed to pass. At this point it is 6AM on Sunday, the third day of my exam, and around 44 hours since my exam began.
I was ecstatic, but also really tired. I paused my exam and got some much needed rest.
Fast forward to Monday and a pretty ruined sleep schedule. The next step was deciding between pursuing the final two remaining flags and receiving my cert or not pursuing the two remaining flags and still receiving my cert. I opted for the latter option, which I sort of regret to be honest. I ended up using the day to handle some admin (AKA real life) stuff and rest. Part of me is still curious as to the steps it would take to get the final two flags.
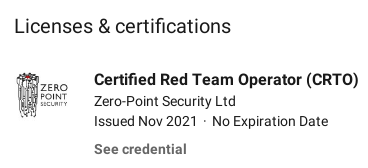
Anyways, after the exam environment closed, I officially received my CRTO certification and passed the course.
My CRTO cert on my LinkedIn:
Closing Thoughts
There is elegance in being succinct. CRTO was a breath of fresh air after banging my head against the ~800-page PDF that is OSCP. I really appreciate Rasta’s presentation of information, and can personally say this is the first time ever I’ve really looked forward to going through course material.
Maybe you just passed your OSCP and are looking to transition into a red team/threat emulation role.
Maybe you’re already running internal network pentests and want to up your game to the next level.
Maybe you just want to use Cobalt Strike for a fraction of the price.
Whether or not any of these are true, I would highly recommend this course to anyone looking to further develop their red team skill set.